06. Steps For Obstacle Detection
Header Text
Steps For Obstacle Detection
Overview of Detection Pipeline
Now that the pcd is filtered you are ready to deploy the same segmentation and clustering techniques that we applied before in the previous lessons, now using the new intensity point processor inside
cityBlock
.
Step 1. Segment the filtered cloud into two parts, road and obstacles.
ND313 C1 L4 A21 Segmented PCD [LB]
After you filter the point cloud the next step is to segment it. The image below shows the filtered point cloud segmented (road in green), (obstacles in red), with points only in the filtered region of interest. The image also displays a purple box showing the space where the car's roof points were contained, and removed.
Segmented PCD
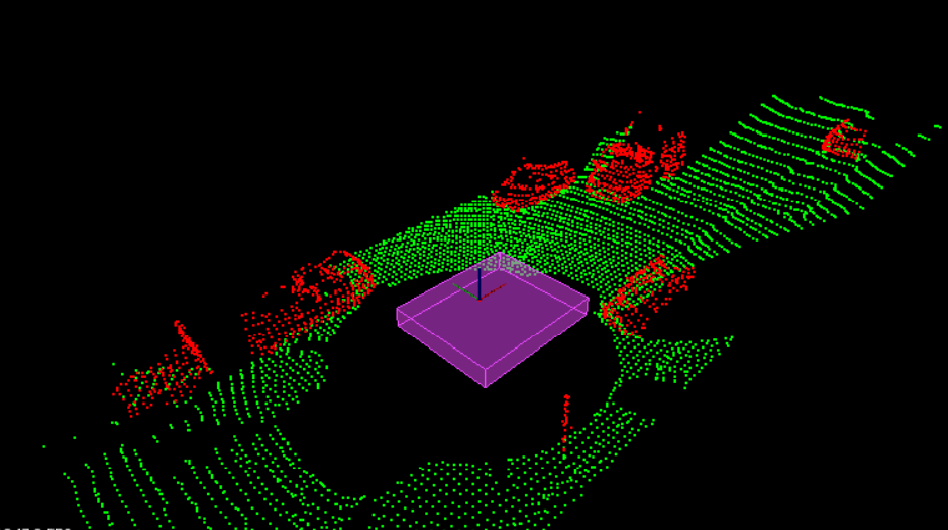
Segmented point clouds. The purple box shows where ego car roof point were removed.
Segmentation
Step 2. Cluster the obstacle cloud
ND313 C1 L4 A25 Clustering PCD [LB]
Next you cluster the obstacle cloud based on the proximity of neighboring points. The image below shows the clusters in cycled colors of red, yellow, and blue. In that image we see that the oncoming truck is actually broken up into two colors, front and back. This illustrates the challenges with clustering based on proximity, the gap between the front of the truck and the back of the truck is large enough so that they look separate. You might think to fix this by increasing the distance tolerance, but you can also see that the truck is getting really close to one of the side parked cars. Increasing the distance tolerance would run the risk of the truck and parked car being grouped together.
Clustering PCD
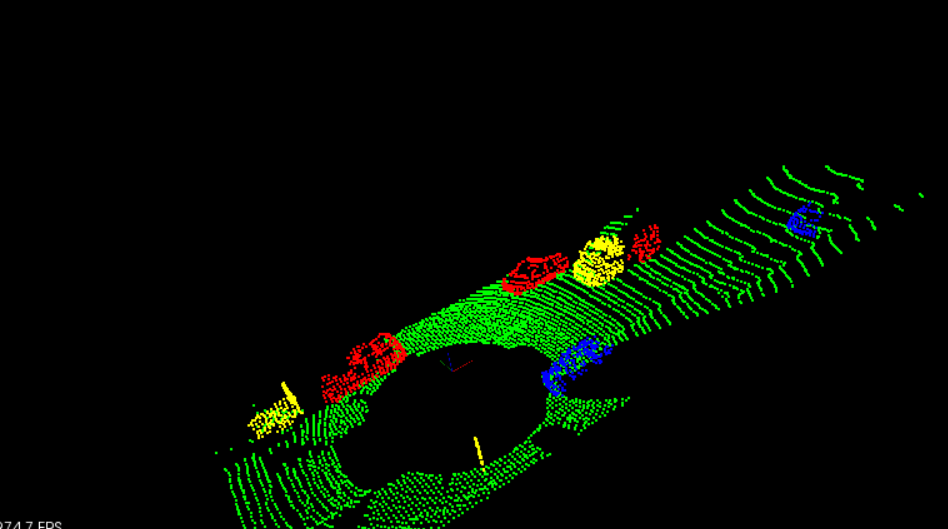
Clustering the point cloud. Different cluster shown in cycled colors, red, yellow, and blue.
Clustering
Step 3. Find bounding boxes for the clusters
Finally you place bounding boxes around the individual clusters. Since all the detectable vehicles in this scene are along the same axis as our car, the simple already set up bounding box function in point processor should yield good results.
Bounding Box PCD
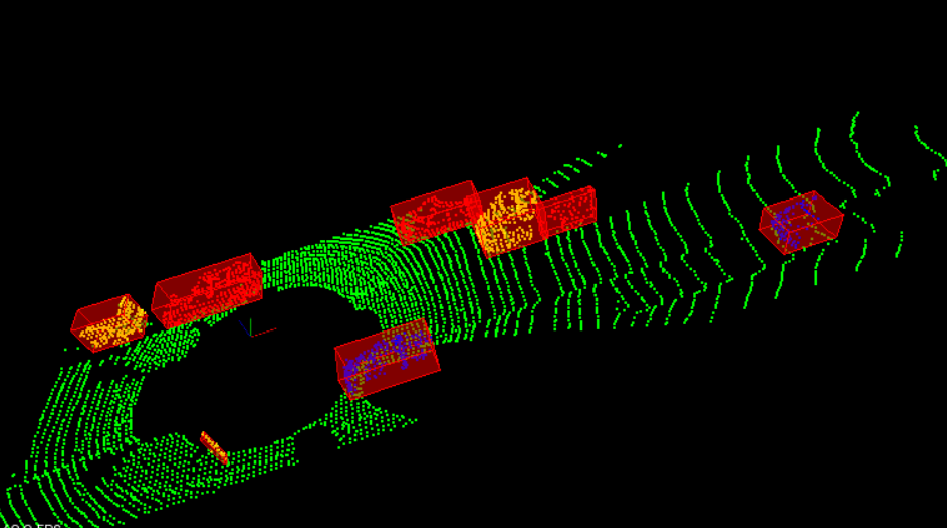
Bounding boxes around cluster obstacles.
Bounding Boxes
Awesome! Congratulations for making it through the point process pipeline on a real pcd file. Once you are happy with your results from a single frame, let's look at processing a stream of frames.
Workspace
This section contains either a workspace (it can be a Jupyter Notebook workspace or an online code editor work space, etc.) and it cannot be automatically downloaded to be generated here. Please access the classroom with your account and manually download the workspace to your local machine. Note that for some courses, Udacity upload the workspace files onto https://github.com/udacity , so you may be able to download them there.
Workspace Information:
- Default file path:
- Workspace type: react
- Opened files (when workspace is loaded): n/a